Here's an overview:
- Introduction to jewelry making with elastic beading wire
- The choice of the right elastic thread
- Supplies needed for working with elastic thread
- Preparatory steps for stringing beads
- Techniques for tightening elastic beading thread
- Tying the first knot: step by step
- Tips to hide the button in elastic thread
- Safety and strength: reinforce the knot with glue
- Finishing techniques for a professional look
- Creative ideas for designs with elastic beading thread
- Common mistakes and how to avoid them
- Maintenance of jewelry with elastic thread
- Conclusion and additional tips for the enthusiastic jewelry maker
Introduction to jewelry making with elastic beading wire

Making jewelry with elastic beading wire is a popular and accessible form of creative expression. It is an activity suitable for both beginners and experts in the world of jewelry making. Elastic beading thread, often called stretch thread, is widely used for stringing beads to create flexible and comfortable bracelets, necklaces and other types of jewelry.
One of the main advantages of elastic beading thread is its stretchability, which means that jewelry is easy to put on and take off without using a clasp. This makes it an ideal choice for quickly made jewelry and projects where ease of use is paramount.
When working with elastic beading thread, it is important to know a number of basic principles:
- The choice of wire thickness depends on the type and size of the beads.
- Before using the wire, it is advisable to stretch it slightly beforehand to prevent stretching after completing the jewelry.
- Finishing elastic thread requires a specific knotting technique to ensure that the knot does not come loose and the beads stay in place.
The technique of finishing elastic thread with a knot is crucial for the durability and aesthetics of the jewelry. The following paragraphs outline the steps required to successfully apply this finishing technique. This not only involves tying the knot itself, but also tips to ensure that the knot remains firm and is less visible between the beads.
The choice of the right elastic thread
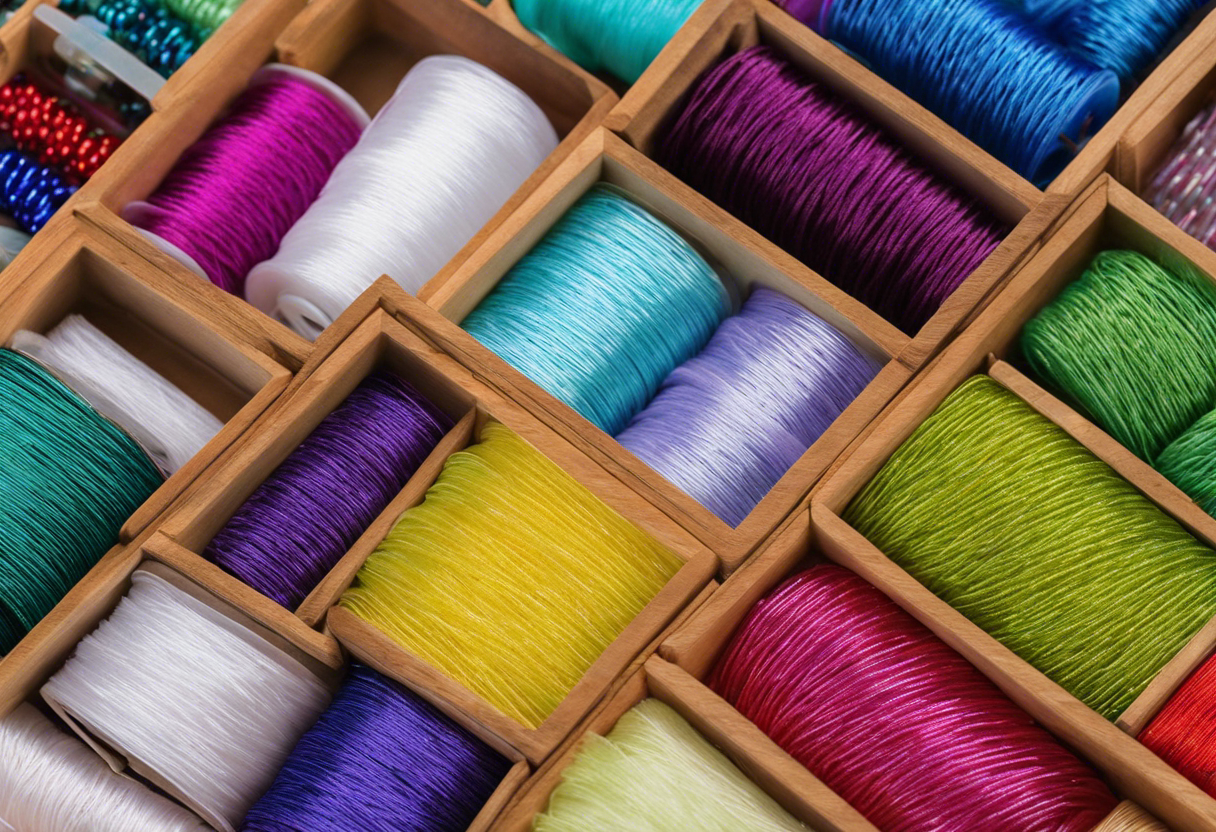
When making elastic jewelry, it is essential to choose the right elastic beading thread. This can be the difference between a durable piece of jewelry and one that breaks quickly. Here are some points to take into account:
-
Thickness of the beading wire : The thickness of the elastic should match the size of the holes in the beads. Too thick beading thread will not fit, and too thin may be less durable or the beads may damage the thread.
-
Stretchability : Some elastics stretch more than others. Good stretch is important for comfort, but too much stretch can lead to the jewelry sagging.
-
Material : Elastic beading thread is available in different materials, such as rubber, silicone, and elastomeric compounds. Some materials are stronger and last longer than others.
-
Wearing comfort : The thread should feel comfortable on the skin, especially on bracelets and rings that make direct contact with the wearer.
-
Transparency : For some designs it is better if the elastic is not visible. In that case, a transparent beading thread may be the best choice.
-
Durability : It is important to consider how often the jewelry will be worn and how much stress it will bear. For jewelry that is often worn, a more durable elastic is better.
By carefully considering which type of elastic best suits the design and use of the jewelry, one can ensure that the finished product will be both beautiful and functional. Choosing the right elastic is a critical step in the jewelry making process that should not be overlooked.
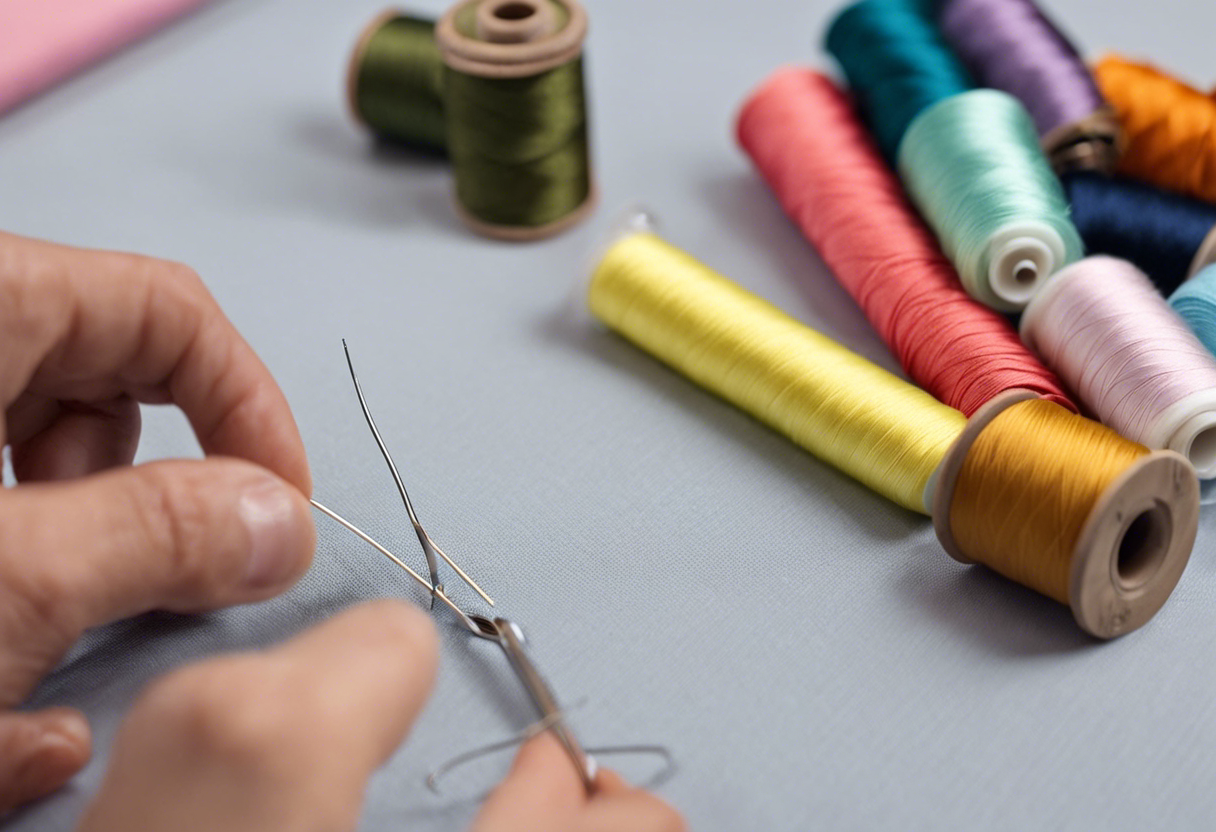
Supplies needed for working with elastic thread
When making jewelry with elastic beading wire, you will need some essential materials and tools to make the process go smoothly. Here's what you need:
- Elastic beading wire : Choose a beading wire with the correct thickness for your beads. Wire that is too thin can break, while wire that is too thick can be difficult to pass through the beads.
- Beads : Provide beads with holes large enough for the elastic thread to pass through twice.
- Scissors : Good scissors are essential to cut the thread neatly without fraying.
- Glue : Special jewelry glue or clear nail polish can be used to seal and strengthen the button.
- Tweezers : Tweezers can help hold and tighten the knot, especially if space between beads is limited.
- Bead stopper or paper clip : These tools are useful to prevent the beads from sliding off the wire during work.
Remember to choose a good work space with enough light so that you can see the beads and thread clearly. Working comfortably is essential for a good result.
Preparatory steps for stringing beads

Before you start stringing beads on elastic thread, it is important to make the right preparations. This will make the process go smoother and ensure a neat finish. Here are the preparations one needs to make:
-
Collecting materials : Make sure all necessary materials are at hand. This includes the beads, elastic beading thread, scissors, possibly a bead board and a glue suitable for sealing the knot.
-
Determining length : Measure the desired length of the bracelet or necklace and cut the elastic with a few centimeters extra. This ensures that there is enough room to tie a knot without having to worry about the beads accidentally slipping off the thread.
-
Using a stopper : Place a bead stopper or piece of tape at the end of the thread to keep the beads from sliding off while stringing.
-
Arranging beads : Sort and arrange the beads in the desired pattern before beginning stringing. If necessary, use a bead board so that the beads stay in the correct order, which can make the process considerably easier.
-
Stringing : Start stringing the beads onto the elastic. Make sure there is not too much tension on the wire; This can lead to a bent or broken beading thread.
-
Leave space for the knot : Leave some space for the knot at the beginning and end of the strung beads. The beading thread should not be stretched too tight, to give the bracelet or chain some flexibility.
By carefully following these preparatory steps, the foundation is laid for a beautifully finished piece of jewelry.
Techniques for tightening elastic beading thread
When making elastic jewelry, tightening elastic beading thread is crucial for the durability and appearance of the jewelry. Here are some techniques to do this properly:
-
Stretch the Elastic before Use: Before you start stringing, it is advisable to stretch the elastic several times. This 'pre-stretches' the elastic, reducing the chance of stretching after wearing.
-
Choose the Right Thickness: Make sure the thickness of the elastic matches the size of the beads. Elastic that is too thin can easily break, while elastic that is too thick is difficult to tie and can feel uncomfortable.
-
Keep Tension While Stringing: Keep the elastic tight, but not excessively, while stringing the beads. This ensures that the beads remain close together and that there are no weak areas in the bracelet or necklace.
-
Make a Firm Knot: After stringing the beads, make a firm knot. A surgical knot or double knot is recommended for elastic thread as it is less likely to come loose.
-
Glue the Button: For extra security, you can apply a drop of jewelry glue or clear nail polish to the button. Let it dry completely before continuing.
-
Hide the Knot: After securing the knot, you can hide it by pulling it through a nearby bead. Use a beading needle if things get difficult.
By following these techniques, a jewelry maker can ensure that their creation is both beautiful and durable. The correct use of elastic beading thread can make all the difference in how the jewelry looks and how long it lasts.
Tying the first knot: step by step
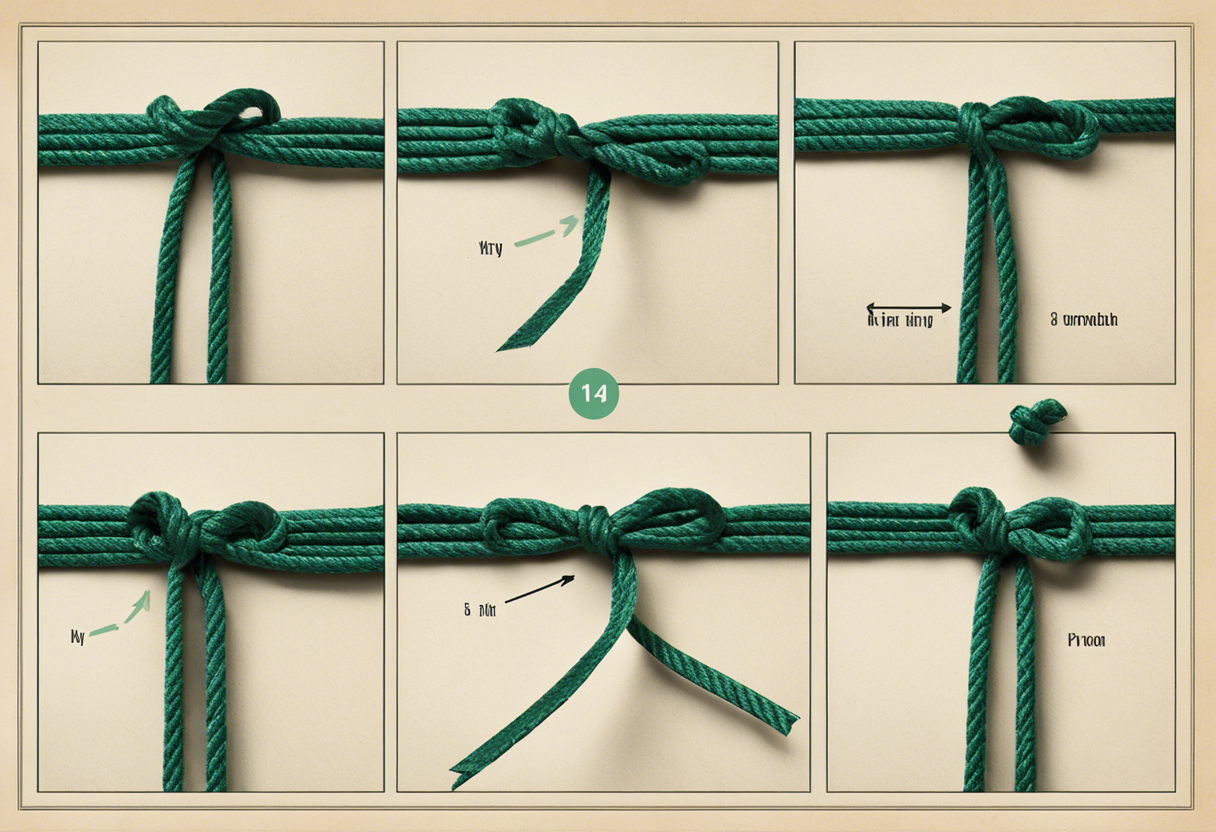
Making jewelry is a detail-oriented activity where finishing elastic thread with a sturdy knot is essential. Below is a step-by-step guide to tying the first knot to ensure your jewelry is not only beautiful, but also durable.
-
Sizing : Before you start, make sure the beading thread is the correct length for the jewelry you want to make. Also take into account a small extra piece of thread for the button.
-
Pull the wire tight : Thread all the beads onto the elastic wire and gently pull it so that the beads lie tightly against each other.
-
Tying the first knot : Take the two ends of the beading thread and cross them over each other, as if you were going to tie a simple shoelace knot.
-
Tightening : Pass one end under the other and gently tighten the knot until it rests against the beads. Be careful not to pull too hard, as this could cause the thread to break.
-
Extra security : For extra security, tie a second knot on top of the first. This is especially recommended for heavy beads or frequent use.
-
Finishing the button : To ensure that the button does not come undone, you can apply a drop of jewelry glue or clear nail polish to the button. Let it dry thoroughly.
-
Cutting Thread Ends : Cut off the excess thread, but leave enough so that the weight of the beads won't pull the knot apart.
By following these steps carefully, you will lay a solid foundation for your jewelry and reduce the chance of losing beads or unexpectedly breaking the beading wire.
Tips to hide the button in elastic thread
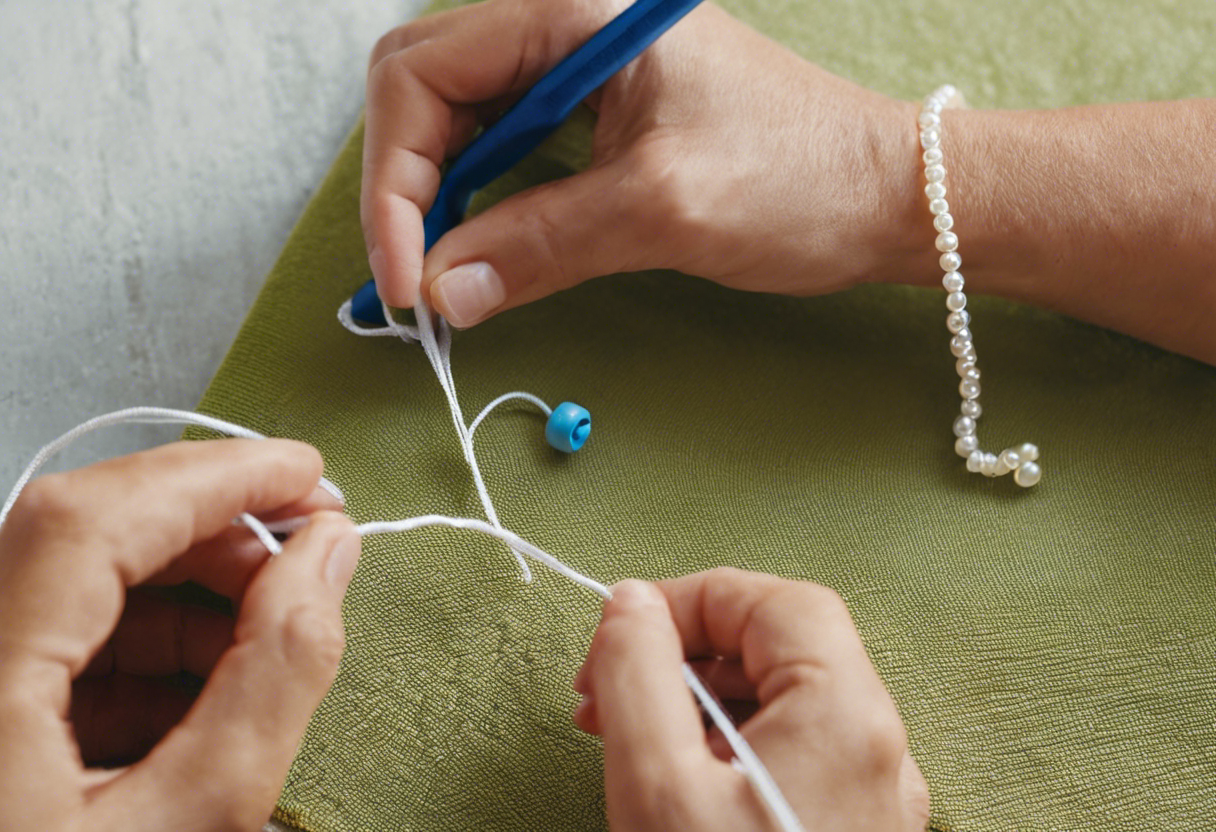
Finishing elastic beading thread with a knot is an essential skill in jewelry making. However, the knot being visible can detract from the final design. Here are tips to neatly hide the knot and give your jewelry a professional look:
- Make sure you make a smooth knot. A tight and flat knot is easier to hide than a bulky, loose knot.
- Use a drop of jewelry glue on the button. This strengthens the knot and minimizes the chance of it coming undone, allowing you to make the knot smaller and more discreet.
- Pull the knot into a nearby bead. After gluing, you can carefully pull the knot into the hole of a larger bead so that it is no longer visible.
- Choose transparent elastic. A transparent thread makes the knot less noticeable.
- Match the color of the button with the beads. If you are using colored elastic, use a color similar to the color of the beads to make the knot less noticeable.
- Use a bead cap or an end cap. After stringing the beads and making the knot, a bead cap can be placed over the knot so that it is not visible.
- Use the stretch magic knotting technique. You make a specific knot that is secure and small, making it less noticeable.
- Provide sufficient wire. Leave enough thread to tie comfortably and neatly tuck the ends away.
Successfully concealing the knot will result in a beautifully finished bracelet or necklace where the emphasis is on the beads and not the beading thread.
Safety and strength: reinforce the knot with glue
When finishing jewelry strung on elastic, the durability of the finish plays a crucial role. It is therefore important to apply additional reinforcement in addition to a properly tied knot, for example by using glue. This ensures that the knot does not come loose and the jewelry retains its shape and functionality.
To strengthen the knot of the elastic cord with glue, follow the following steps:
- First tie a secure knot in the elastic. Make sure the knot is pulled tight so that the beads don't have unnecessary room to move.
- Cut away the excess elastic, but leave about two millimeters of elastic on either side of the knot.
- Choose suitable jewelry glue. This glue must remain flexible after hardening so as not to hinder the mobility of the jewelry.
- Apply a small amount of glue to the button itself. Be careful so that the glue does not end up on the remaining elastic or beads. Using a toothpick, for example, can help apply the glue precisely.
- Allow the glue to dry according to the directions on the package. This usually takes a few minutes to a few hours.
- If necessary, hide the button inside a bead with a larger hole, once the glue has fully set, to make the finish even neater.
This extra reinforcement with glue significantly reduces the risk of wear and loosening of the knot, which will extend the life of your homemade jewelry.
Finishing techniques for a professional look

When making jewelry with elastic beading wire, the finish is crucial for a professional result. Here are some techniques to finish the knot safely and neatly:
-
Use clear nail polish or jewelry glue to seal the knot. Apply a small amount to the knot, let it dry thoroughly before continuing. This makes the knot stronger and less visible.
-
Hide the knot in a bead. Choose a bead with a hole large enough to accommodate the button. This gives the jewelry a seamless look and prevents the knot from coming into contact with the skin.
-
Reduce the tension on the elastic before tying the knot. This prevents the elastic from stretching over time and ensures a better fit of the jewelry.
-
Use a knotting technique that ensures a flat and clean finish. For example, the surgeon's knot, which offers extra security and less chance of unraveling.
-
After tying the knot, do not cut the ends of the elastic too close to the knot. Leave a little space so the knot doesn't come undone.
-
For an extra professional touch, you can opt for a finishing bead or charm that falls over the button. This adds a decorative element while camouflaging the finish.
Carefully following these finishing techniques ensures a durable piece of jewelry and a neat appearance that reflects the craftsmanship.
Creative ideas for designs with elastic beading thread

When making jewelry with elastic beading wire, you can give free rein to your creativity. Here are some inspiring ideas to create unique and personal jewelry:
-
Multi-strand bracelets : Use elastic beading wire to make multi-strand bracelets. You can vary the color, type of beads and size for a playful effect.
-
Beaded Stretch Rings : Small beads combined on elastic stringing wire can form beautiful rings that are comfortable and fit any finger.
-
Elastic Beaded Headbands : Not just for jewelry, elastic beading wire can also be used to make stylish headbands that are both practical and beautiful.
-
Ankle straps : Especially in the summer, elastic ankle straps are a nice addition to your outfit. Add charms or shells for a bohemian touch.
-
Children's Jewelry : The use of elastic beading wire is ideal for children's jewelry due to its stretchability and durability. Choose colorful and fun beads.
-
Layered Necklaces : By combining different lengths of elastically strung chains, you create a layered effect that stands out.
-
Chakra Healing Bracelets : Choose beads that correspond to the seven chakras and string them on elastic for a spiritual accessory.
-
Festive jewelry : Add glittering beads or crystals to your elasticated jewelry for a sparkling festive effect.
-
Men's bracelets : Cool bracelets can also be created for men with elastic thread, for example with dark-colored beads or metal elements.
-
Mix and match : Combine different materials, such as wooden beads with gemstone or metal accents, for an eclectic look.
Remember that it is important to use the correct knotting technique to ensure that your creation is durable and comfortable to wear. This means that your homemade jewelry will not only be beautiful, but also sturdy.
Common mistakes and how to avoid them

Care is essential when finishing elastic beading thread with a button. Here are some common mistakes and how to avoid them:
-
Over-tightening : Over-tightening the elastic may leave little flexibility and can cause the elastic to wear out and break more quickly. Make sure there is enough space between the beads for flexibility.
-
Using a single knot : A single knot is often not enough to keep the thread secure. It is better to make a double or even triple knot for extra security.
-
Do not reinforce a button : A button can come loose if it is not reinforced. Use a drop of jewelry glue or nail polish on the knot before cutting off the excess wire.
-
Leaving too short thread after the knot : Leave about 2 centimeters of thread after the knot before cutting it. This makes it easier to hide it and prevents the knot from coming undone.
-
Not properly hiding the thread : After tying, the ends should be tucked between the beads. If this is not done properly, they can protrude and irritate the skin.
To avoid the above mistakes, it is important to proceed patiently and carefully. This increases the durability of your jewelry and ensures a finished result that looks professional.
Maintenance of jewelry with elastic thread

Properly maintaining jewelry with elastic beading wire is essential to ensure that it remains beautiful and retains its elasticity. Here are some tips for carefully maintaining this jewelry:
-
Avoid prolonged exposure to sunlight: Elastic can dry out and become brittle from too much sunlight. Therefore, do not store jewelry with elastic in places where there is direct sunlight.
-
Avoid contact with chemicals: Chemicals such as perfumes, lotions and cleaning products can damage the elastic. Remove your jewelry during activities that may come into contact with these substances.
-
Do not pull too hard on the elastic: When putting on and taking off, it is important not to put too much force on the elastic. This could lead to stretching and faster wear of the beading thread.
-
Clean carefully: Clean the jewelry with a soft, damp cloth and some mild soap. Avoid scrubbing or using hard brushes.
-
Store in a safe place: It is wise to store elastic bracelets or necklaces separately to prevent them from becoming tangled with other jewelry and damaged.
-
Check the elasticity regularly: Over time, elastic can lose its elasticity. Check regularly that the beading thread is not stretched or showing wear, and replace it if necessary.
-
Take them off during strenuous activities: It is wise to remove jewelry with elastic bands during activities such as sports, swimming or sleeping, to avoid unnecessary pressure and wear.
With these precautions, the lifespan of jewelry with elastic beading wire can be significantly extended, so you can enjoy your handmade creations for longer.
Conclusion and additional tips for the enthusiastic jewelry maker
Finishing jewelry with elastic beading thread by means of a secure knot is a basic technique that is both simple and essential for the jewelry maker. Care and precision lead to a beautiful end result and guarantee that jewelry is durable. Here are some additional tips to help jewelry makers refine their skills:
- Use the right knot : The surgeon's knot is a good choice for elastic because it is sturdier than a standard knot.
- Pre-treating elastic : Tensioning or pre-stretching the elastic can prevent jewelry from stretching after use.
- Using glue : A small drop of jewelry glue can strengthen the knot and provide extra security.
- Finish neatly : After gluing the knot, it is important to cut off the excess ends as close to the knot as possible for a neat finish.
- Hide the button : Hide the button in a large enough bead for a professional look.
- Experiment with materials : Different materials and thicknesses of elastic can provide different effects and strength. Find out what works best for your project.
By integrating these additional tips into their practice, jewelry makers can refine their technique and take their creations to the next level. The ultimate goal is that every handmade piece of jewelry is not only beautiful, but also practical and durable.